前言
可视化圈选是一个较为特别的场景,一般在定义页面事件与埋点的时候用的比较多,
这边来讨论下网页中可视化圈选的实现思路。
体验的话可以到插件WEB-ROBOT
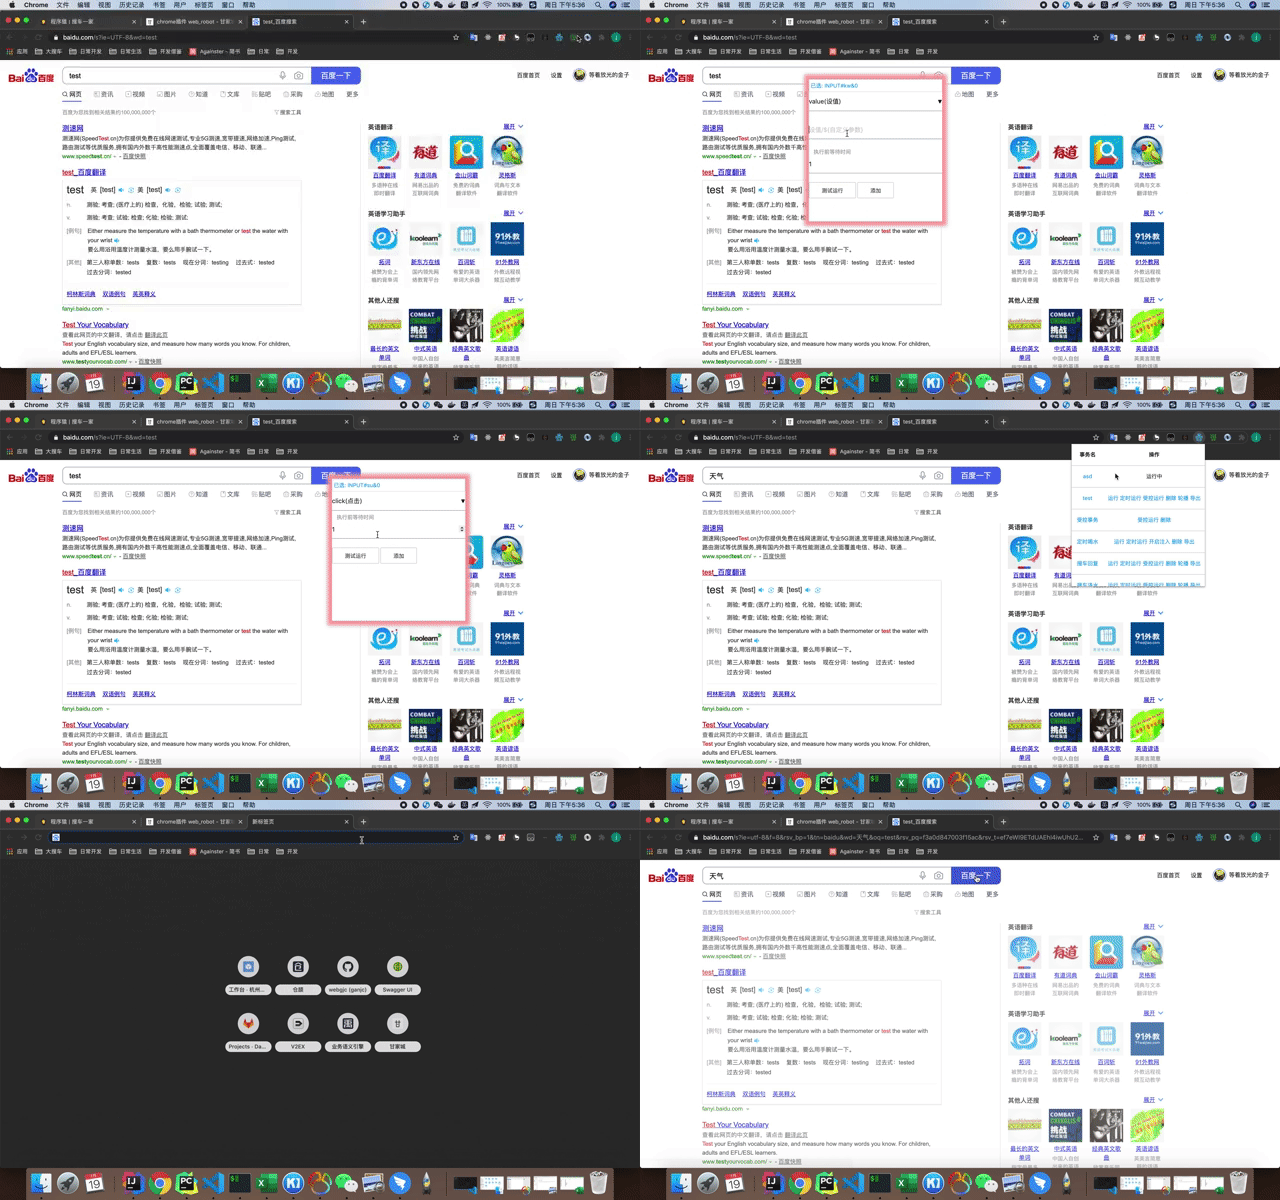
效果:

概览
完成可视化圈选大致分为以下几个步骤
- 捕获鼠标移动事件
- 给出当前元素的可视化反馈
- 点击选中元素
- 转换当前元素的唯一选择器
这边实现大致不同点为,选择器是当前元素和所有父节点元素。
最后还需另外选择一下想要的元素。
好处是多了一些会漏掉节点,上面的只能是默认最子节点。
实现
事件捕获
首先确定要重写的监听事件为 mouseover(鼠标移到元素上),click(点击元素);
在移动的时候,target为当前元素,需要有一个样式变化。
同时需要之前的元素样式给去掉。
然后在点击的时候则需要获取到当前元素和他所有父元素的筛选器。
表示已经选中了该字段
下面通过代码来解释
也可以直接将这部分代码跑在浏览器console中
1
2
3
4
5
6
7
8
9
10
11
12
13
14
15
16
17
18
19
20
21
22
23
24
25
26
27
28
29
30
31
32
33
34
35
36
37
38
39
40
41
42
43
44
45
46
47
48
49
50
51
52
53
54
55
56
57
58
|
function direct_select_dom(cb) {
let last_dom;
let last_dom_border;
let last_dom_boxshadow;
let last_dom_zindex;
document.onmouseover = (e) => {
e.stopPropagation();
e.preventDefault();
if (e.target.id === "robot_frame" || e.target.id === "robot_select") return;
let tmp = e.target.style.border;
let tmp1 = e.target.style.boxShadow;
let tmp2 = e.target.style.zIndex;
e.target.style.border = "solid 2px #ffa3a3";
e.target.style.boxShadow = "0px 0px 8px 8px #ffa3a3";
e.target.style.zIndex = 999;
if (last_dom !== undefined) {
last_dom.style.border = last_dom_border;
last_dom.style.boxShadow = last_dom_boxshadow;
last_dom.style.zIndex = last_dom_zindex;
}
last_dom = e.target;
last_dom_border = tmp;
last_dom_boxshadow = tmp1;
last_dom_zindex = tmp2;
};
document.addEventListener(
"click",
function (e) {
e.stopPropagation();
e.preventDefault();
let dom = e.target;
let selectors = [];
while (dom.parentElement.parentElement) {
if (dom.clientWidth > 0 && dom.clientHeight > 0) {
let selector = dom_to_selector(document, dom)
selectors.push(`${selector[0]}&${selector[1]}`);
}
dom = dom.parentElement;
}
cb && cb(selectors, e);
},
true
);
}
|
dom转selector
这个在baidu基本搜不到这个话题,在google有一些。
这边大致说几个实现
当前节点遍历
这个是最初的思路为,
对一个dom的选择器来说,id优先,class次之,最后是tag
首先以这些为选择器进行querySelectorAll操作,得到一批符合的节点,然后在遍历选择得到当前相等的节点。
结构模式为
#id / .class / tag
document.querySelectorAll(selector)[n]
优点是获取方便,
但特别依赖dom有唯一id或者class,
在tag的时候选择器很容易变。
1
2
3
4
5
6
7
8
9
10
11
12
13
14
15
16
17
| function get_selector(dom) {
let selector;
if (dom.id) {
selector = `${dom.nodeName}[id="${dom.id}"]`;
} else if (dom.class) {
selector = `${dom.nodeName}[class="${dom.className}"]`;
} else {
selector = `${dom.nodeName}`;
}
let nodelist = document.querySelectorAll(selector);
for (i in nodelist) {
if (nodelist[i] === dom) {
return [selector, i];
}
}
return null;
}
|
遍历父节点使用nth-child
这个的思路为先得到这个节点在他父节点的第几个节点,
然后父节点继续向上递归,直到body或html节点。
1
2
3
4
5
6
7
8
9
10
11
12
13
14
15
| function get_selector(el) {
names = [];
do {
index = 0;
var cursorElement = el;
while (cursorElement !== null) {
++index;
cursorElement = cursorElement.previousElementSibling;
}
names.unshift(el.tagName + ":nth-child(" + index + ")");
el = el.parentElement;
} while (el !== null);
return names.join(" > ");
}
|
结构模式为
HTML:nth-child(1) > BODY:nth-child(2) > DIV:nth-child(1)
document.querySelectorAll(selector)
结合优化版
首先还是确定当前节点的选择定位,
如果是id,则可以确定他是全局唯一的,直接使用,
如果是class或者tag,则将这个作为他在父节点中的选择器,(替换上面的nth-child)
递归他的父节点,直到body
最后再在全局使用上面的选择器确定他是第几个
这样做优化点与第一个比走了递归父节点的模式,可以在tag和class时更加精确。
与第二个比加入了id直接确定的模式,也改进了使用nth-child在动态数据节点不精确
1
2
3
4
5
6
7
8
9
10
11
12
13
14
15
16
17
18
19
20
21
22
23
24
25
26
27
28
29
30
31
32
33
34
| function dom_to_selector(dom) {
let names = [];
let dombak = dom;
do {
if (!dom || !dom.parentElement) break;
if (dom.id && isNaN(Number(dom.id[0]))) {
names.unshift(`${dom.tagName}#${dom.id}`);
break;
} else {
let tmp;
let classNames = [];
for (let i = 0; i < dom.classList.length; i++) {
classNames.push(dom.classList[i]);
}
if (classNames.length > 0) {
tmp = `${dom.tagName}.${classNames.join(".")}`;
} else {
tmp = `${dom.tagName}`;
}
names.unshift(tmp);
}
dom = dom.parentElement;
} while (dom !== null);
let selector = names.join(" > ");
let nodes = document.querySelectorAll(selector);
for (let i = 0; i < nodes.length; i++) {
if (nodes[i] === dombak) {
return [selector, i];
}
}
}
|
结构模式为
“BODY > ARTICLE > DIV.container > DIV.row > DIV.col…iner > FIGURE.highlight.js > DIV.table-responsive”, 0
或者如
“H2#id”, 0
使用
document.querySelectorAll(selector)[n]

 支付宝打赏
支付宝打赏 微信打赏
微信打赏